Linux环境搭建
# Linux虚拟机安装及相关java服务环境的搭建
# 1、Linux环境搭建
# 虚拟机下载
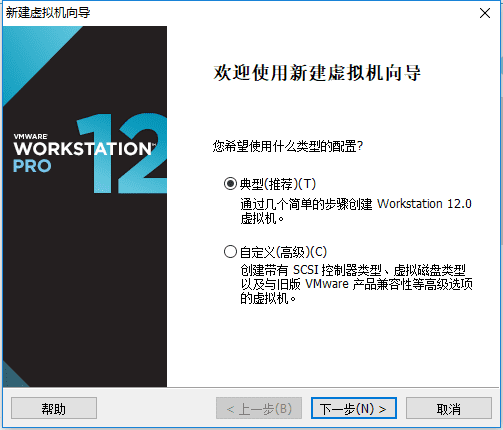
VMWareVMware Workstation是一款功能强大的桌面虚拟软件,可模仿物理机器承载多个虚拟操作系统下载
- 资源下载地址 链接:https://pan.baidu.com/s/1OFVRzCySbrzLs-P37Iw9gg 提取码:wiih
安装
- 安装博客:https://blog.csdn.net/babyxue/article/details/80970526
# Linux镜像下载
CentOS7
这里我们采用CentOS 7操作系统,该系统是目前企业中使用率非常高的系统 下载地址:http://mirrors.aliyun.com/centos/7.6.1810/isos/x86_64/

CentOS-7-x86_64-DVD-1810.iso:标准安装版(推荐)CentOS-7-x86_64-Everything-1810.iso:完整版,集成所有软件CentOS-7-x86_64-LiveGNOME-1810.iso:GNONE桌面版CentOS-7-x86_64-LiveKDE-1810.iso:KDE桌面版CentOS-7-x86_64-Minimal-1810.iso:精简版,自带软件少CentOS-7-x86_64-NetInstall-1810.iso:网络安装版
迅雷打开
torrent该文件问BT种子文件,使用迅雷下载速度会更快

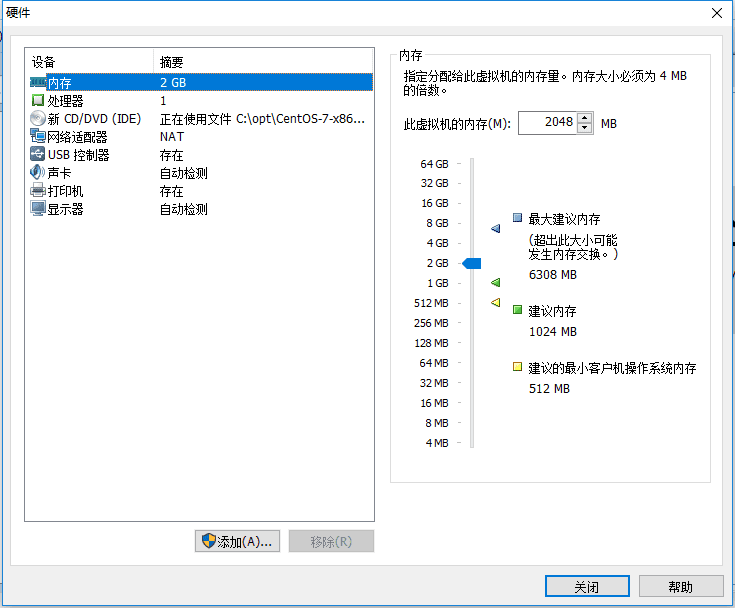
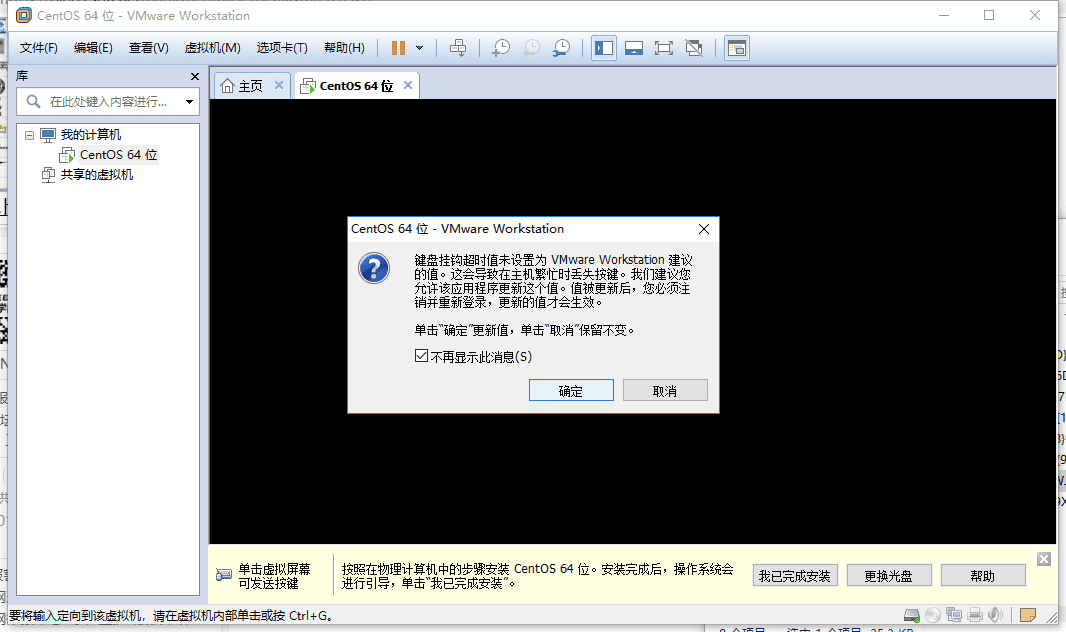
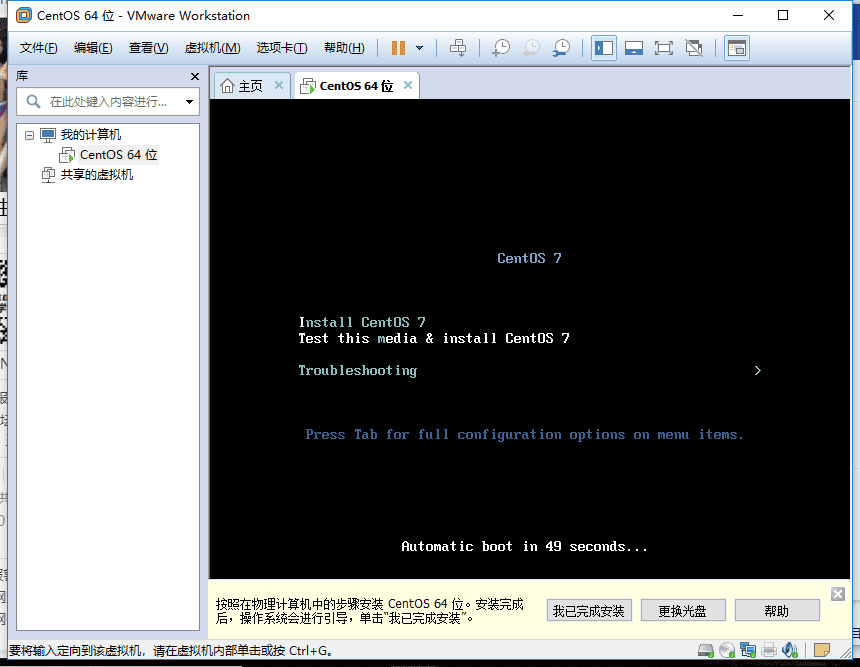
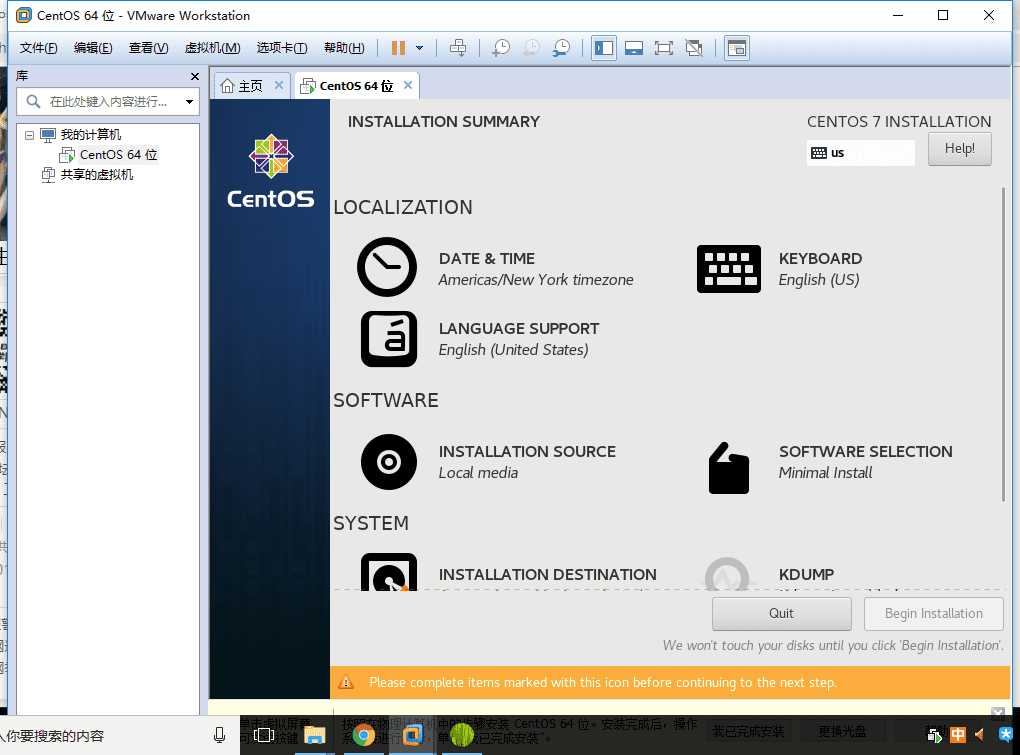
# CentOS镜像安装
镜像安装

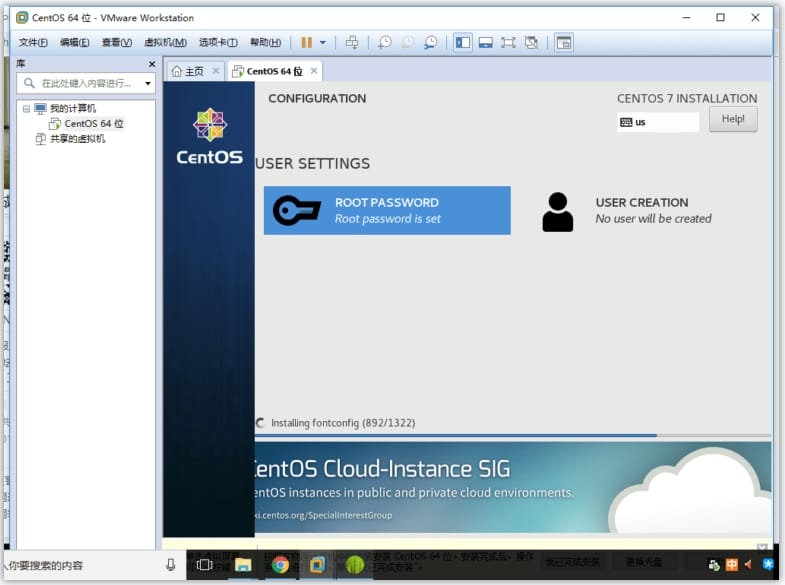
安装配置


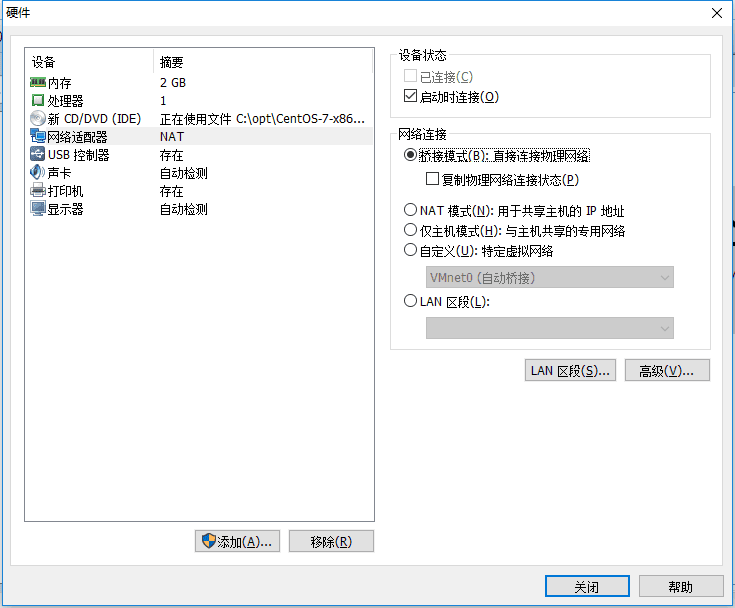
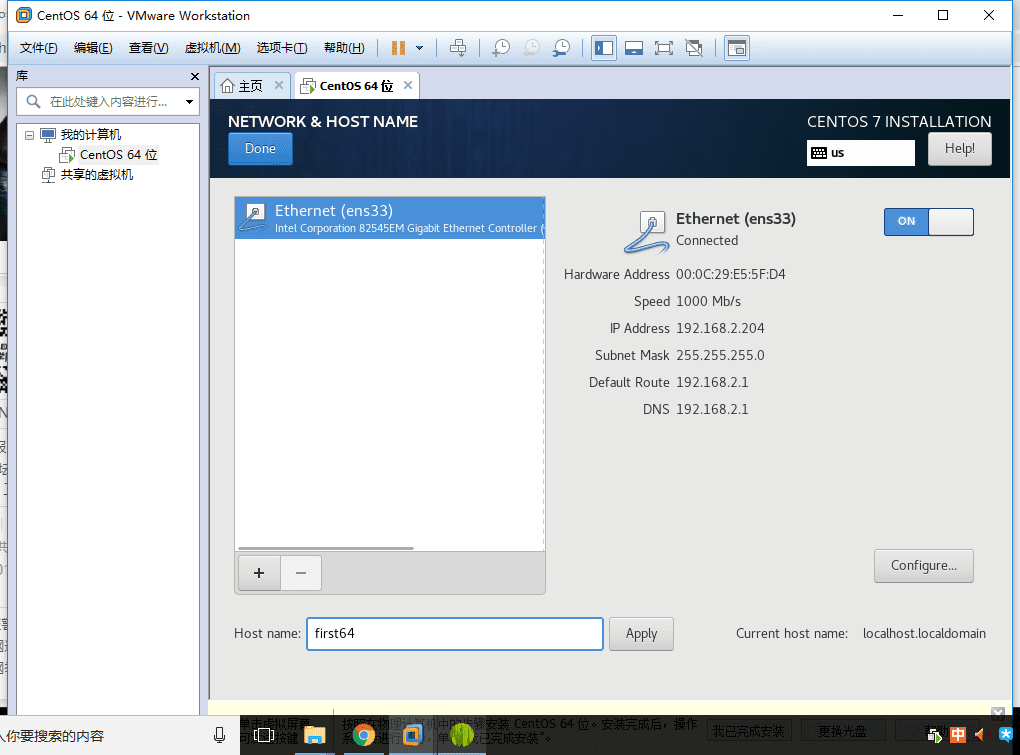
网络配置

# XShell客户端
傻瓜式安装Xshell客户端
查看
CentOS7的端口$ ifconfig # 这里注意是if不是ip,找192.168开头的那个ip1
2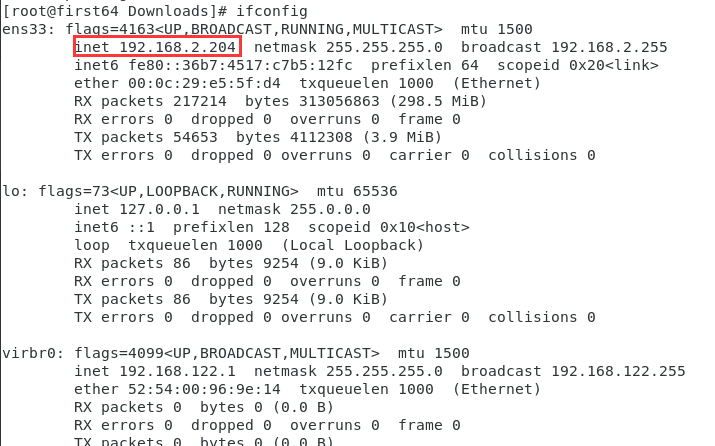
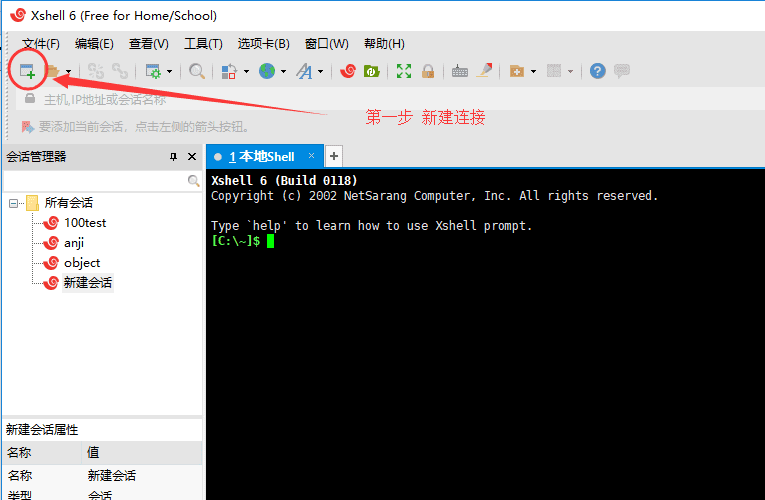
Xshell配置
新建连接
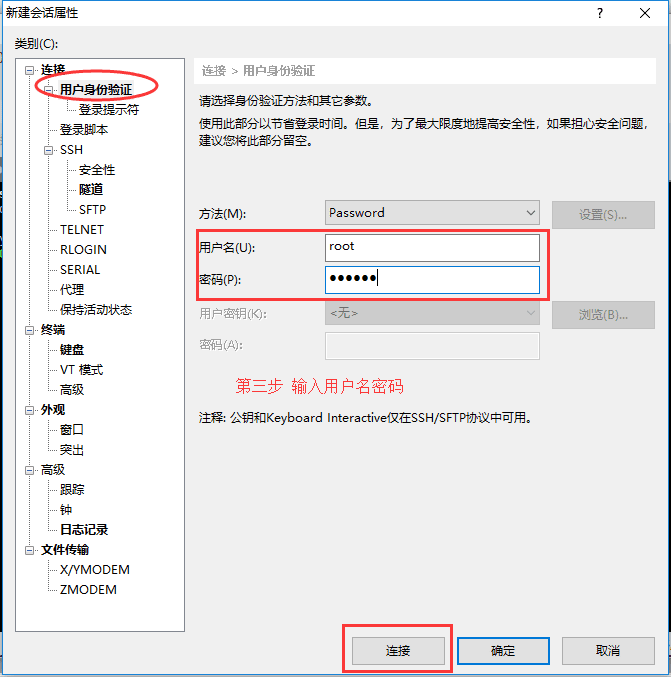
配置连接信息

配置用户名密码
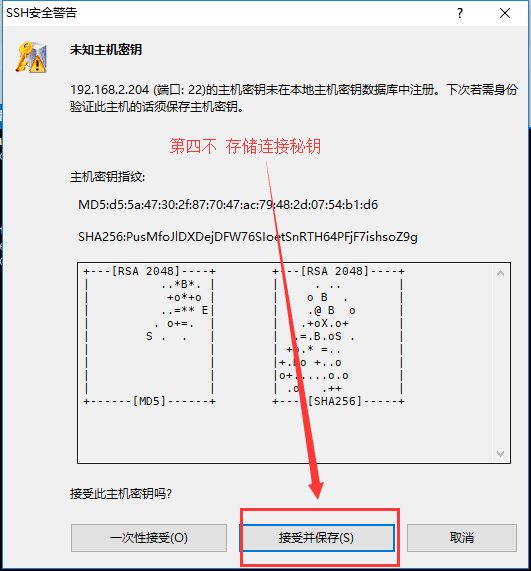
存储连接秘钥
# 2、JDK配置
# 卸载已有的open-jdk
查看目前已有的JDK
$ rpm -qa | grep jdk1输出如下
copy-jdk-configs-3.3-10.el7_5.noarch
java-1.8.0-openjdk-1.8.0.181-7.b13.el7.x86_64
java-1.8.0-openjdk-headless-1.8.0.181-7.b13.el7.x86_64
1
2
3执行删除命令
# 删除你执行时出现的结果
$ rpm -e --nodeps java-1.8.0-openjdk-1.8.0.181-7.b13.el7.x86_64
$ rpm -e --nodeps java-1.8.0-openjdk-headless-1.8.0.181-7.b13.el7.x86_64
1
2
3再次查看确认
# 再次确认,没有之后表示卸载干净
$ rpm -qa | grep jdk
1
2
# 安装oracle官方jdk
- 准备好jdk.tar.gz文件,并使用解压命令
tar -zxvf jdk.gz.tar将其解压
# a、全局安装
使用vim命令编辑
/etc/profile文件,在最后一行追加如下内容##jdk1.8 export JAVA_HOME=/usr/local/java/jdk1.8.0_181 export PATH=$JAVA_HOME/bin:$PATH export CLASSPATH=.:$JAVA_HOME/lib/dt.jar:$JAVA_HOME/lib/works/2021s.jar1
2
3
4使JDK配置生效,并查看版本号
$ source /etc/profile
$ java -version
# 输出版本号则表示成功
1
2
3
# b、用户安装
使用vim命令编辑
.bash_profile文件,在最后一行追加如下内容export JAVA_HOME="/home/ruoyi/jdk1.8.0_231" export PATH=$JAVA_HOME/bin:$PATH:$HOME/.local/bin:$HOME/bin1
2使JDK配置生效,并查看版本号
$ source .bash_profile
$ java -version
# 输出版本号则表示成功
1
2
3
# 3、MySQL安装
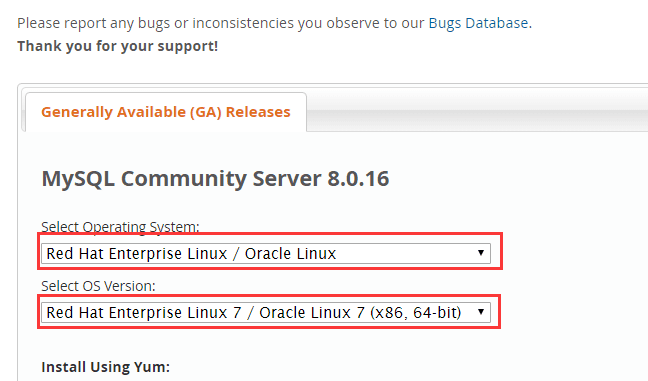
# 下载安装
这里是CentOS7_64操作系统,所以我采用rpm包进行安装
下载:https://dev.mysql.com/downloads/mysql/
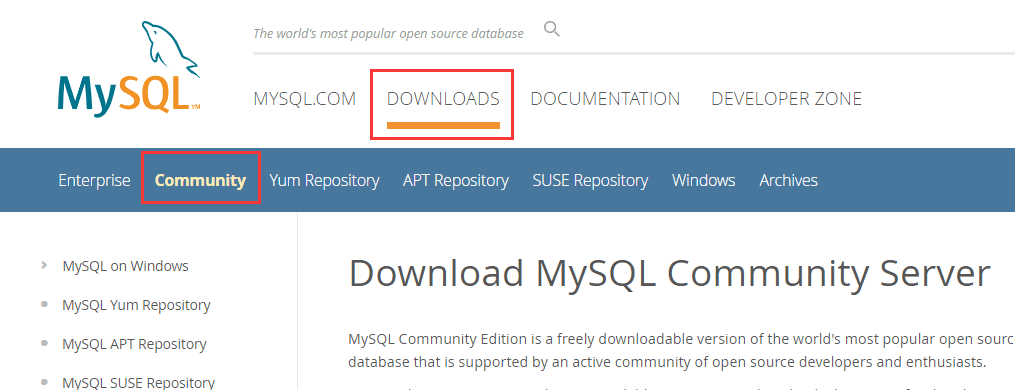
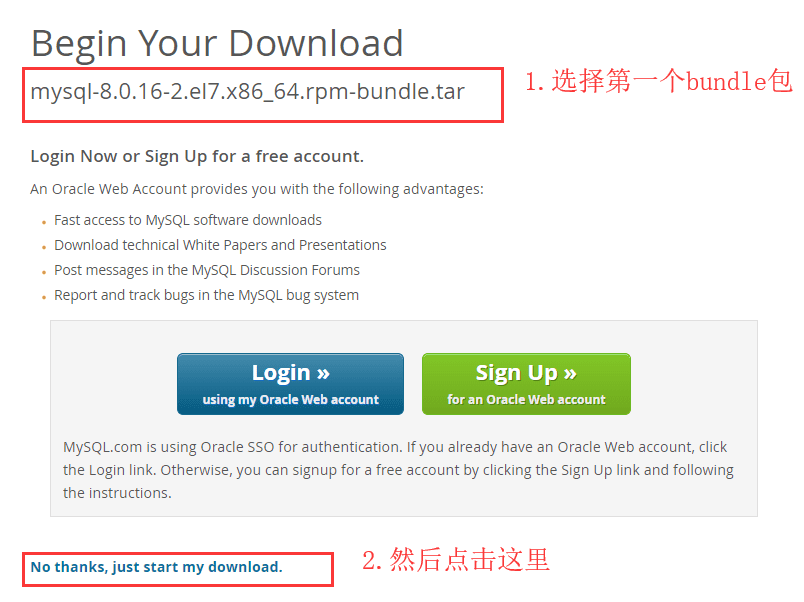
这里最好是右键复制链接之后采用迅雷进行下载,速度很快
# 移除mariadb
安装之前先检测有没有mariadb,如果有则移除,执行如下命令
# 查看,我这里显示有
[root@iz2zehvxttbua2f45dp7ihz java]# rpm -qa | grep mariadb
mariadb-libs-5.5.56-2.el7.x86_64

# 接着使用下面命令进行移除
[root@iz2zehvxttbua2f45dp7ihz java]# rpm -e mariadb-libs-5.5.56-2.el7.x86_64 --nodeps

# 再次查看有没有,没有则表示移除干净了
[root@iz2zehvxttbua2f45dp7ihz java]# rpm -qa | grep mariadb
2
3
4
5
6
7
8
9

# 上传安装文件
我们使用cd名跳转到
/usr/local目录下,并执行mkdir mysql命令,创建mysql目录并进入[root@iz2zehvxttbua2f45dp7ihz java]# cd .. [root@iz2zehvxttbua2f45dp7ihz local]# ls [root@iz2zehvxttbua2f45dp7ihz local]# mkdir mysql [root@iz2zehvxttbua2f45dp7ihz local]# cd mysql1
2
3
4这里建议使用ftp上传,安装xftp或者其他ftp工具,使用ftp连接后进行上传,上传到
/usr/local/mysql目录
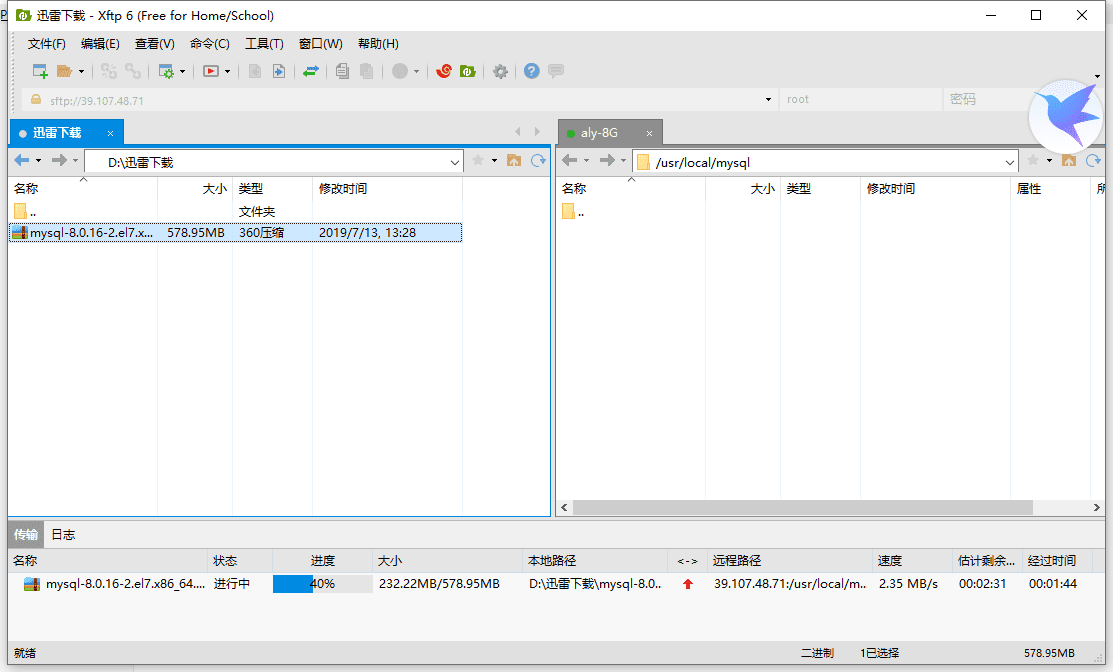
查看文件目录位置及文件信息

# 解压安装
执行解压命令进行解压
[root@iz2z7ihz mysql]# tar -xvf mysql-8.0.16-2.el7.x86_64.rpm-bundle.tar1
执行安装命令进行安装
安装common
# 命令:rpm -ivh mysql-community-common-8.0.16-2.el7.x86_64.rpm --nodeps --force

[root@iz2zehvxttbua2f45dp7ihz mysql]# rpm -ivh mysql-community-common-8.0.16-2.el7.x86_64.rpm --nodeps --force
1
2
3安装libs
# 命令:rpm -ivh mysql-community-libs-8.0.16-2.el7.x86_64.rpm --nodeps --force

[root@iz2zehvxttbua2f45dp7ihz mysql]# rpm -ivh mysql-community-libs-8.0.16-2.el7.x86_64.rpm --nodeps --force
1
2
3安装client
# 命令:rpm -ivh mysql-community-client-8.0.16-2.el7.x86_64.rpm --nodeps --force

[root@iz2zehvxttbua2f45dp7ihz mysql]# rpm -ivh mysql-community-client-8.0.16-2.el7.x86_64.rpm --nodeps --force
1
2
3安装server
# 命令:rpm -ivh mysql-community-server-8.0.16-2.el7.x86_64.rpm --nodeps --force

[root@iz2zehvxttbua2f45dp7ihz mysql]# rpm -ivh mysql-community-server-8.0.16-2.el7.x86_64.rpm --nodeps --force
1
2
3查看已安装的包
[root@iz2zehvxttbua2f45dp7ihz mysql]# rpm -qa | grep mysql
mysql-community-libs-8.0.16-2.el7.x86_64
mysql-community-server-8.0.16-2.el7.x86_64
mysql-community-common-8.0.16-2.el7.x86_64
mysql-community-client-8.0.16-2.el7.x86_64
1
2
3
4
5
初始化
通过以下命令完成mysql初始化操作
mysqld --initialize1如果报如下错误信息:
mysqld: error while loading shared libraries: libaio.so.1 : cannot open shared object file: No such file or directory则安装下
libaio.so.1包# 方案1 yum install -y libaio # 方案2,如果方案1安装后,继续初始化mysql没成功,则执行该方案 yum install -y libaio.so.11
2
3
4
5授权服务防火墙配置
#给mysql目录授权给mysql组合mysql用户,该步骤一般不用操作,我们使用的root用户拥有所有权限,
$ chown mysql:mysql /var/lib/mysql -R;

# 启动mysql服务
systemctl start mysqld.service;

# 配置开机启动
$ systemctl enable mysqld;
1
2
3
4
5
6
7
8
查看数据库默认密码
# 该密码为随机生成kQ*q9a1eQpZq
[root@sdfsdf mysql]# cat /var/log/mysqld.log | grep password
1
2
拿到查询出的密码进行数据库的登录
mysql -u root -p
# 然后将密码复制粘贴过来,密码不显示,直接回车登录即可
1
2
修改密码
ALTER USER 'root'@'localhost' IDENTIFIED WITH mysql_native_password BY '123456';1
然后退出以修改后的密码重新登录

授权远程访问
create user 'root'@'%' identified with mysql_native_password by '123456';
grant all privileges on *.* to 'root'@'%' with grant option;
flush privileges;
1
2
3
修改加密规则,目前可视化工具如Navicat普遍只支持MySQL5.X,所以我们需要调整8.0的加密规则
-- 修改命令
ALTER USER 'root'@'localhost' IDENTIFIED BY 'root' PASSWORD EXPIRE NEVER;

-- 刷新权限
flush privileges;
1
2
3
4
5执行
exit退出mysql控制台此时你采用
Navicat等可视化客户端是无法连接该服务的,因为端口未对外开放
防火墙配置
本地虚拟机需要开启防火墙,CentOS6采用的iptables,而CentOS7采用的是systemctl,所以下面我们采用CentOS7的配置
#查看防火墙状态
$ systemctl status firewalld

#启动防火墙,防火墙启动后,除了22端口对外能够访问,其他端口均不能使用,所以需要添加
$ systemctl start firewalld

#添加端口
 firewall-cmd --zone=public --add-port=80/tcp --permanent
 firewall-cmd --zone=public --add-port=3306/tcp --permanent
 firewall-cmd --zone=public --add-port=6379/tcp --permanent

#重新加载
$ firewall-cmd --reload
1
2
3
4
5
6
7
8
9
10
11
12
13
查看mysql配置文件
  # 默认的配置文件为:/etc/my.cnf
  $ cat /etc/my.cnf
1
2注意
Linux下的MySQL数据库大小写敏感,所以SQL语句中的表名区分大小写
忽略大小写配置
$ vim /etc/my.conf [mysqld] lower_case_table_names=1
1查看进程语句
$ ps -ef | grep mysql1
# 4、Redis服务安装
# 下载安装
进入
/usr/local目录$ cd /usr/local1离线下载
https://redis.io/download1在线下载
$ wget http://download.redis.io/releases/redis-5.0.5.tar.gz1解压
$ tar xzf redis-5.0.5.tar.gz1安装gcc
由于redis通过源码安装,依赖gcc编译器,首先确认其机器gcc版本,保证其gcc版本在4.2以上,我这里为4.8故直接跳过该步:
$ gcc –v
gcc version 4.8.5 20150623 (Red Hat 4.8.5-4) (GCC)
1
2# 安装命令 $ yum install gcc1
2redis安装
$ cd redis-5.0.5

# 编译安装
$ make MALLOC=libc

# 编译测试
$ make test
1
2
3
4
5
6
7若编译测试出现问题,则直接安装肯定也不通过,可能会出现如下异常
[root@iz2zehvxttbua2f45dp7ihz redis-5.0.5]# make test
cd src && make test
make[1]: Entering directory `/usr/local/redis/redis-5.0.5/src'
    CC Makefile.dep
make[1]: Leaving directory `/usr/local/redis/redis-5.0.5/src'
make[1]: Entering directory `/usr/local/redis/redis-5.0.5/src'
You need tcl 8.5 or newer in order to run the Redis test
make[1]: *** [test] Error 1
make[1]: Leaving directory `/usr/local/redis/redis-5.0.5/src'
make: *** [test] Error 2
1
2
3
4
5
6
7
8
9
10上面异常信息说需要tcl包提供支持,所以我们接着安装tcl包
# 安装tcl包
$ yum install tcl
1
2安装完成后再次执行
make test,直到输出成功为止将
/usr/local/redis-5.0.5/src目录下的文件加到/usr/local/bin目录$ cd src && make install1
启动redis服务
$ ./redis-server1
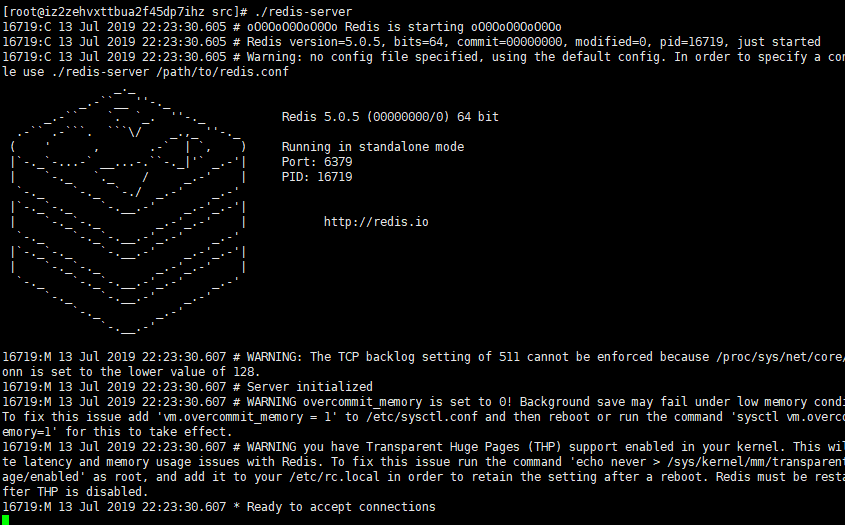
该启动方式会随着控制台的退出而关闭,所以我们需要将该服务已后台启动的方式启动
# 配置为后台服务
修改
redis.conf文件$ vim redis.conf 将 daemonize no 改为 daemonize yes1
2
3
4
5
6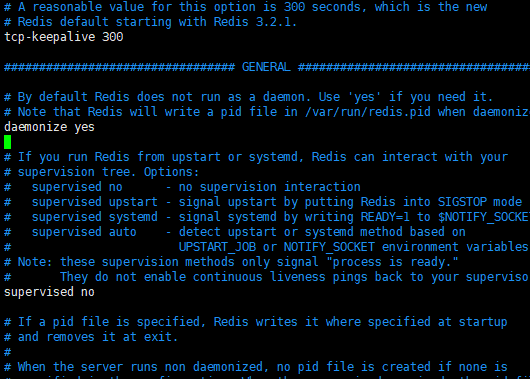
将
redis.conf复制到/etc/redis目录下,并改名为6379.conf$ cd /etc $ mkdir redis $ cd redis $ cp /usr/local/redis/redis-5.0.5/redis.conf 6379.conf # 该文件为稍后安装的后台服务使用的配置文件1
2
3
4
5复制启动脚本到
/etc/rc.d/init.d/,并改名为redisd# 启动脚本在/redis-5.0.5/utils目录下 $ cp -f /usr/local/redis/redis-5.0.5/utils/redis_init_script /etc/rc.d/init.d/redisd1
2修改复制后的
redisd文件,使之能成为服务$ cd /etc/rc.d/init.d/ $ vim redisd1
2在脚本的第一行后面添加一行内容,如下
  新版本应该不用加了
  #chkconfig:2345 80 90
1
2修改EXEC、CLIEXEC的路径
# 原内容
EXEC=/usr/local/bin/redis-server CLIEXEC=/usr/local/bin/redis-cli
# 修改后的内容
EXEC=/usr/local/redis/redis-5.0.5/src/redis-server CLIEXEC=/usr/local/redis/redis-5.0.5/src/redis-cli
- 在$EXEC $CONF后面加上 & 1
2
3
4
5添加开机启动
$ chkconfig redisd on1启动服务
# 你要将6379端口添加到防火墙中
$ firewall-cmd --zone=public --add-port=6379/tcp --permanent #重新加载 $ firewall-cmd --reload
$ service redisd start Starting Redis server... 16842:C 13 Jul 2019 23:24:46.881 # oO0OoO0OoO0Oo Redis is starting oO0OoO0OoO0Oo 16842:C 13 Jul 2019 23:24:46.881 # Redis version=5.0.5, bits=64, commit=00000000, modified=0, pid=16842, just started 16842:C 13 Jul 2019 23:24:46.881 # Configuration loaded
~~~shell
# 退出控制台,redis也不会关闭了
# 停止服务
$ service redisd stop
1
2
3
4
5修改密码
$ vim /etc/redis/6379.conf
# 将requirepass的注释放开,并更改密码,保存退出
1
2
requirepass hosredis
1支持外部宿主机远程连接
停止redis服务
$ service redisd stop1
如果停止不了,则可以强杀进程和删除pid
  # 查看进程信息
  $ ps -ef | grep redis
  root    14603   1  0 15:09 ?    00:00:00 /usr/local/redis-5.0.5/src/redis-server
  # 强制杀进程 kill -9 进程id
  $ kill -9 14603
1
2
3
4
5修改
/etc/redis/6379.conf
$ vim /etc/redis/6379.conf
# 将bind的值由127.0.0.1改为0.0.0.0
bind 0.0.0.0
- 重启服务

~~~shell
$ service redisd start
1
2
3
4
5外部再次尝试连接

redis-cli工具使用redis-cli工具是redis提供的命令工具,常用命令如下$ redis-cli 如果有密码,则需要auth认证 127.0.0.1:6379> auth hosredis OK 127.0.0.1:6379> set efg 456 OK 127.0.0.1:6379> get efg "456" 127.0.0.1:6379> exit1
2
3
4
5
6
7
8
9
# 5、Nginx安装

# 下载
本地下载
http://nginx.org/en/download.html

下载后上传至
CentOS下的/usr/local目录下wget直接下载$ cd /usr/local $ wget http://nginx.org/download/nginx-1.17.1.tar.gz1
2
# 安装
解压安装包
$ tar -zxvf nginx-1.17.1.tar.gz1注意:nginx被解压到了
/usr/local/nginx-1.17.1目录下 (不要把压缩包解压到/usr/local/nginx目录下,或者将解压后的目录重命名为nginx,因为nginx会默认安装到/usr/local/nginx目录下)安装前准备
安装前先安装
nginx所需的依赖库,如果缺少依赖库,可能会安装失败$ yum install gcc-c++ $ yum install pcre $ yum install pcre-devel $ yum install zlib $ yum install zlib-devel $ yum install openssl $ yum install openssl-devel1
2
3
4
5
6
7进入
nginx-1.17.1目录,并执行以下配置命令$ cd nginx-1.17.1 $ ./configure1
2configure操作会检测当前系统环境,以确保能成功安装nginx,如果出错,请检查上述安装前依赖包是否已经安装
如果出现如下信息表示你需要安装依赖库
gcc库未安装提示
checking for OS
     + Linux 3.10.0-123.el7.x86_64 x86_64
    checking for C compiler ... not found
    ./configure: error: C compiler cc is not found
1
2
3
4PCRE库未安装提示
 ./configure: error: the HTTP rewrite module requires the PCRE library.
    You can either disable the module by using --without-http_rewrite_module
    option, or install the PCRE library into the system, or build the PCRE library
    statically from the source with nginx by using --with-pcre=<path> option.
1
2
3
4zlib库未安装提示
 ./configure: error: the HTTP gzip module requires the zlib library.
    You can either disable the module by using --without-http_gzip_module
    option, or install the zlib library into the system, or build the zlib library
    statically from the source with nginx by using --with-zlib=<path> option.
1
2
3
4
如果没有其他错误,则可进行下一步
执行make安装
注意:下面2步会将nginx安装到/usr/local/nginx目录下,所以请勿占用nginx目录命名
# make
$ make install
1
2
3如果上述2步操作未报错,你可以切换到上一级目录,会发现nginx目录已经存在了
$ cd ..
$ cd nginx
$ ls
1
2
3配置nginx开机启动
切换到
/lib/systemd/system/目录,创建nginx.service文件vim nginx.service$ cd /lib/systemd/system/ $ vim nginx.service1
2添加如下内容:
[Unit]
Description=nginx
After=network.target

[Service]
Type=forking
ExecStart=/usr/local/nginx/sbin/nginx
ExecReload=/usr/local/nginx/sbin/nginx reload
ExecStop=/usr/local/nginx/sbin/nginx quit
PrivateTmp=true

[Install]
WantedBy=multi-user.target
1
2
3
4
5
6
7
8
9
10
11
12
13退出并保存文件,执行如下名使
nginx开机启动$ systemctl enable nginx.service1# 启动nginx $ systemctl start nginx.service # 结束nginx $ systemctl stop nginx.service # 重启nginx $ systemctl restart nginx.service1
2
3
4
5
6
7
8验证是否安装成功
# 你要将80端口添加到防火墙中
$ firewall-cmd --zone=public --add-port=80/tcp --permanent
#重新加载
$ firewall-cmd --reload

#在浏览器访问如下地址
#http://192.168.2.204/
1
2
3
4
5
6
7
提供SSL证书服务
在配置了SSL证书后,重新启动报如下错误
[root@iz2zehvxttbua2f45dp7ihz sbin]# ./nginx -s reload
nginx: [emerg] the "ssl" parameter requires ngx_http_ssl_module in /usr/local/nginx/conf/object.nginx.conf:14
1
2表示当前Nginx缺少SSL模块,我们可以查看nginx版本
[root@iz2zehvxttbua2f45dp7ihz sbin]# ./nginx -V
nginx version: nginx/1.17.1
built by gcc 4.8.5 20150623 (Red Hat 4.8.5-36) (GCC)
configure arguments:
1
2
3
4如果带有SSL模块,在上面输出的信息最后一行应该有如下参数,如下图
--prefix=/usr/local/nginx --with-http_stub_status_module --with-http_ssl_module1
添加SSL模块
切换到源码安装包,就是带版本的那个nginx文件夹
# cd /usr/local/nginx-1.17.11执行如下命令
# ./configure --prefix=/usr/local/nginx --with-http_stub_status_module --with-http_ssl_module1配置完成后执行如下命令
# make
# 切忌,只执行make,不要执行make install,否则会覆盖
1
2停止服务,备份原来的
nginx.sh文件# systemctl stop nginx.service # cp /usr/local/nginx/sbin/nginx /usr/local/nginx/sbin/nginx.bak1
2将源码包中的
nginx文件覆盖到正在使用的nginx执行文件# cp -f /usr/local/nginx-1.17.1/objs/nginx /usr/local/nginx/sbin/nginx1重启并查看版本
# systemctl start nginx.service
# /usr/local/nginx/sbin/nginx -V
1
2

配置SSL证书
详见:https://www.jianshu.com/p/3f6a39064f7d